Introduction
There’s nothing quite like the magic of twinkling Christmas lights illuminating your home during the holiday season. Whether you’re aiming for a cozy, warm glow or a dazzling light show, hanging outdoor Christmas lights is a cherished tradition for many. However, safety should always come first when working with electricity and ladders outdoors.
Over the years, I’ve learned the ins and outs of hanging Christmas lights safely and effectively. From choosing the right tools to securing lights properly, I’ll share my best tips to help you create a stunning display without compromising safety. Let’s dive in and make your outdoor lighting project both beautiful and secure!
Why Safety Matters
Before we get into the how-to, let’s talk about why safety is so important:
- Electrical Hazards: Faulty wiring or improper connections can lead to shocks, fires, or damage to your home.
- Falls: Working at heights increases the risk of injury if proper precautions aren’t taken.
- Weather Conditions: Outdoor lights are exposed to rain, snow, and wind, which can cause accidents if not installed securely.
By following these guidelines, you’ll minimize risks and ensure your holiday display shines brightly all season long.
Step 1: Gather Your Supplies
Having the right tools and materials is essential for a safe and successful installation. Here’s what you’ll need:
- Christmas Lights: Choose LED lights for energy efficiency and durability.
- Extension Cords: Use outdoor-rated extension cords designed for wet conditions.
- Timers: Automate your lights to turn on and off at specific times.
- Ladder: A sturdy step ladder or extension ladder rated for outdoor use.
- Light Clips or Hooks: These prevent damage to your roof, gutters, or siding.
- Power Strip: Opt for a weatherproof power strip with built-in surge protection.
- Gloves and Non-Slip Shoes: Protect your hands and feet while working.
- Measuring Tape: To plan your layout and determine cord lengths.
Step 2: Plan Your Layout
A well-thought-out design ensures even coverage and minimizes the risk of overloading circuits. Follow these steps:
- Inspect Your Space: Walk around your property to identify key areas for lights, such as eaves, windows, trees, and shrubs.
- Measure Distances: Use a measuring tape to calculate the total length of lights needed.
- Sketch a Design: Draw a rough diagram of where you’ll place lights, noting outlets and power sources.
- Check Circuit Capacity: Avoid overloading circuits by calculating the total wattage of your lights and ensuring it doesn’t exceed your outlet’s capacity.
LED lights are ideal because they consume less power and generate less heat, reducing the risk of electrical issues.
Step 3: Inspect Your Lights and Equipment
Before hanging anything, inspect your lights and equipment for damage:
- Test the Lights: Plug them in to ensure all bulbs are working. Replace any faulty strands.
- Examine Cords: Look for frayed wires, exposed metal, or other signs of wear. Discard damaged cords immediately.
- Verify Ratings: Ensure all lights, cords, and timers are rated for outdoor use.
This simple step prevents potential hazards and ensures your display looks its best.
Step 4: Use Proper Hanging Techniques
Hanging lights correctly is crucial for both aesthetics and safety. Here’s how to do it:
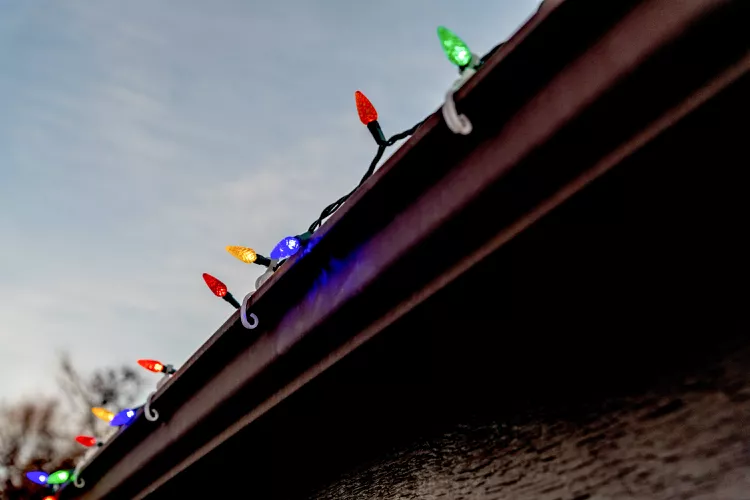
For Gutters and Eaves:
- Use Light Clips: Attach clips to your lights and snap them onto gutters, shingles, or fascia boards. These clips are easy to install and won’t damage your home.
- Avoid Nails or Staples: Never use nails or staples to hang lights, as they can puncture wires and create fire hazards.
For Trees and Shrubs:
- Wrap Trunks and Branches: Gently drape lights over branches or wrap them around tree trunks. Use zip ties sparingly to avoid damaging plants.
- Secure Loose Ends: Tuck loose wires into branches or secure them with hooks to prevent tangling.
For Railings and Porches:
- Use Adhesive Hooks: Stick adhesive hooks to railings or walls for a clean, damage-free installation.
- Drape Evenly: Arrange lights symmetrically for a polished look.
Step 5: Work Safely on Ladders
If you need to climb a ladder, follow these safety tips:
- Choose the Right Ladder: Use a fiberglass or wooden ladder to avoid electrical conductivity.
- Position It Properly: Place the ladder on level ground and extend it at least three feet above the roofline for stability.
- Maintain Three Points of Contact: Always keep two hands and one foot (or vice versa) on the ladder while climbing.
- Have a Spotter: Ask someone to hold the ladder steady while you work.
Never overreach or lean too far—move the ladder instead.
Step 6: Connect Lights Safely
Properly connecting your lights and cords is critical to preventing electrical issues:
- Use Weatherproof Connectors: Seal connections with waterproof covers or electrical tape to protect against moisture.
- Avoid Overloading Outlets: Don’t plug too many strands into a single outlet. Follow the manufacturer’s guidelines for maximum strand connections.
- Install Timers: Set timers to conserve energy and reduce the risk of leaving lights on overnight.
Step 7: Secure Power Sources
Outdoor outlets and power strips require special attention:
- Use GFCI Outlets: Ground Fault Circuit Interrupter (GFCI) outlets prevent electrical shocks in wet conditions.
- Elevate Power Strips: Place power strips in dry, elevated locations, such as under eaves or inside weatherproof enclosures.
- Protect Against Weather: Cover outlets and cords with plastic covers or conduit to shield them from rain and snow.
Step 8: Test Your Display
Once everything is hung and connected, test your display before calling it complete:
- Turn On the Lights: Check that all strands are functioning properly.
- Adjust Placement: Make any necessary tweaks to ensure even lighting and a balanced appearance.
- Inspect Connections: Double-check that all plugs and connectors are secure and weatherproofed.
Step 9: Maintain Your Display
Regular maintenance keeps your lights looking great and ensures continued safety:
- Check for Damage: Periodically inspect lights and cords for signs of wear or damage.
- Remove Snow and Ice: Gently brush off snow or ice buildup to prevent strain on wires.
- Unplug During Storms: Disconnect lights during severe weather to reduce the risk of electrical hazards.
Tips for Success
Here are a few extra tips to enhance your outdoor lighting experience:
- Start Early: Begin decorating in daylight to avoid working in the dark.
- Work with a Partner: Having someone assist makes the process faster and safer.
- Keep It Simple: Focus on quality over quantity—a few well-placed lights can be just as impactful as an elaborate display.
- Store Carefully: After the holidays, coil lights neatly and store them in labeled containers to preserve their lifespan.
Final Thoughts
Hanging Christmas lights outdoors is a wonderful way to spread holiday cheer, but it’s essential to prioritize safety every step of the way. By planning ahead, using the right tools, and following proper techniques, you can create a breathtaking display that delights your family and neighbors without compromising your well-being.
So gather your supplies, enlist a helper, and get ready to transform your home into a winter wonderland. With these tips in mind, you’ll enjoy a festive and hazard-free holiday season. Happy decorating!