Over time, tile grout can lose its luster. Whether it’s discolored, cracked, or moldy, old grout can make even the most beautiful tiles look tired and outdated. The good news? Removing and replacing grout is a DIY-friendly project that can breathe new life into your tiled surfaces. In this guide, I’ll walk you through the process of removing tile grout step by step, so you can achieve professional-looking results without hiring a pro. Let’s get started!
Tools and Materials You’ll Need
Before diving into the project, gather the following tools and materials:
- Grout removal tool (manual or electric)
- Utility knife or grout saw
- Safety goggles and gloves
- Dust mask
- Vacuum or damp cloth
- Small hammer and chisel (optional)
- Grout haze remover (for cleaning residue)
- New grout and grout sealer (for replacement)
Step 1: Prepare the Area
- Clear the Space: Remove any items near the tiled area to give yourself plenty of room to work.
- Protect Surrounding Surfaces: Use painter’s tape to protect adjacent tiles, walls, or fixtures from accidental damage.
- Ventilate the Area: Open windows or use a fan to ensure proper ventilation, especially if you’re working indoors.
Step 2: Choose the Right Grout Removal Tool
The tool you use will depend on the size of the job and your comfort level:
- Manual Grout Removal Tool: Ideal for small areas or delicate tiles. It’s affordable and easy to control.
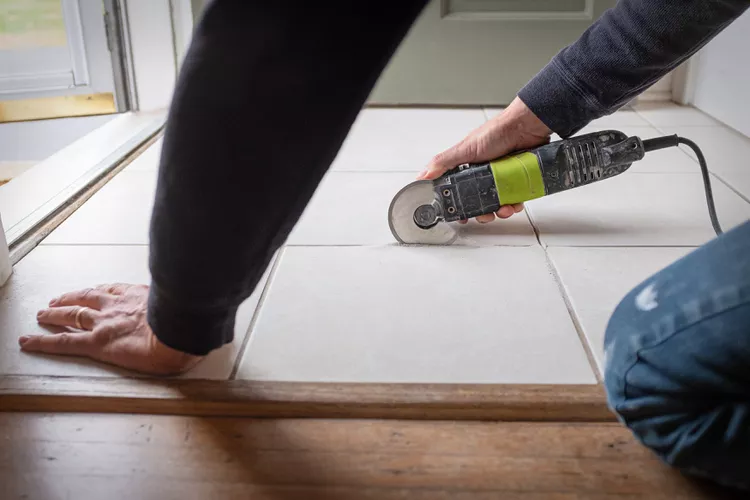
- Oscillating Multi-Tool with Grout Removal Attachment: Perfect for larger projects. It’s faster but requires more precision.
- Rotary Tool with Grout Bit: Great for detailed work but can be harder to control.
Step 3: Start Removing the Grout
- Put on Safety Gear: Wear safety goggles, gloves, and a dust mask to protect yourself from debris.
- Begin at the Edges: Use your chosen tool to carefully scrape out the grout along the edges of the tiles. Work in small sections to avoid damaging the tiles.
- Apply Even Pressure: Use steady, even pressure to avoid chipping the tiles. If you encounter stubborn grout, a small hammer and chisel can help break it up.
- Remove About 2/3 of the Grout Depth: You don’t need to remove all the grout—just enough to make room for the new grout. Aim for about 2/3 of the grout’s depth.
Step 4: Clean Up the Debris
- Vacuum the Area: Use a vacuum with a narrow attachment to remove loose grout and dust from the gaps.
- Wipe Down the Tiles: Use a damp cloth to clean the tiles and remove any remaining residue.
- Apply Grout Haze Remover: If there’s stubborn grout haze on the tiles, use a grout haze remover to restore their shine.
Step 5: Inspect and Repair
- Check for Tile Damage: Inspect the tiles for any chips or cracks that may have occurred during the grout removal process.
- Replace Damaged Tiles: If necessary, carefully remove and replace damaged tiles before proceeding.
Step 6: Apply New Grout
- Mix the Grout: Follow the manufacturer’s instructions to mix the new grout to the right consistency.
- Apply the Grout: Use a rubber grout float to press the grout into the gaps between the tiles. Work at a 45-degree angle to ensure even coverage.
- Remove Excess Grout: Wipe away excess grout with a damp sponge, being careful not to remove too much from the gaps.
- Let It Cure: Allow the grout to dry for the recommended time (usually 24 hours).
Step 7: Seal the Grout
- Apply Grout Sealer: Once the grout is fully cured, apply a grout sealer to protect it from stains and moisture.
- Buff the Tiles: Use a clean cloth to buff the tiles and remove any sealer residue.
Tips for Success
- Work in Small Sections: This helps you maintain control and avoid mistakes.
- Be Patient: Rushing can lead to damaged tiles or uneven grout lines.
- Test Tools First: If you’re using an electric tool, practice on a small, inconspicuous area to get a feel for it.
By following these steps, you can remove old grout and replace it with fresh, clean lines that will make your tiles look brand new. Whether you’re tackling a backsplash, floor, or shower, this guide will help you achieve professional-quality results.